Device Monitoring Service Installation
You can find the following information on this topic.
| Prerequisites |
| Installation |
| Uninstallation |
| Upgrade |
Before you start the installation of the Device Monitoring Service (DMS), note the following prerequisites.
| Prerequisites |
|---|
|
The installer is available to download from CloudStream under the Systems section. Click the version number to start the download.
|
Gather the following information that will be requested by the installer:
|
 Check the version of Java installed on the machine. If Java SE version 17 or later is installed, you must uninstall Java SE before proceeding. The installer will check to determine if Amazon Coretto 17 is installed on the server. If not, a notification message is displayed and you must click Install to proceed. The DMS install will proceed automatically after a successful Corretto install.
-
Run the installer. Choose the Installation language to proceed.
-
In the Welcome screen, click [Next].
-
In the Destination Folder screen, you can change the folder where the DMS will be stored by clicking the [Change...] button.
-
In the Service Logon Information, select the credentials to use to run the service.
-
Login as System Account - Uses the credentials used to login to the server.
-
Login as Windows Account - Uses the specified Windows credential.
-
-
Specify the Friendly Name.
This name will be displayed in the Customer Portal as the DMS name.
By default, the value is the name of the computer on which you are installing the DMS.
-
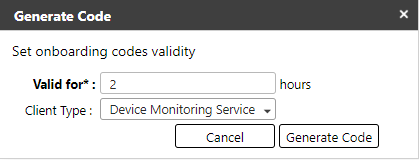
Specify the Onboarding Code.
Generate an Oboarding code in Customer Portal.
Go to System> Security> Client Certificate, then generate a DMS onboarding code.
Ensure that the code you generated does not expire while you are installing the DMS. Generate another code if it expires.
-
Input the Service Locator without the "https://"
Copy the Service Locator address on the Client Certificate page.
The default port is 433.
-
If using a proxy server, check "Enable HTTP Proxy", and then input the needed information; if not, leave it unchecked.
-
On the SQL Server Database screen, do the following.
-
Input the name of the server hostname or the IP address where the MS SQL is configured.
-
Input the port used by the database. The default port is 1433.
-
The value "ricoh_cs_dmservice" is used as the Database name.
-
Check "Run database creation scripts" if the DMS database has not yet been created. If the database is created already, you do not need to check "Run database creation scripts."
-
-
Specify the credentials in the Database Logon Information screen.
Select whether to use windows authentication to access the SQL server or to specify a credential that has access to the SQL Server.
If you enabled "Run database creation scripts", the "Test connection" button will allow you to check if the credentials you provided can access the MS SQL. Ensure that you enter a working credential to proceed with the installation. If the test connection returns a fail, please check if you have access to the MS SQL and if you are using the correct port.
-
Click [Install] to proceed.
If the credential you specified in Service Logon Information (Step 3) cannot authenticate, you will see the message "Service RICOH CloudStream DM Service failed to start."
After a DMS is installed and a certificate is issued, the service will appear in the Customer Portal.
 Now that the DMS is set up, proceed toDevice Monitoring Service Polling & Discovery.
It is recommended to remove the Device Monitoring application from Microsoft Windows prior to deleting the Device Monitoring Service in CloudStream:
-
Uninstall the DMS software via Microsoft Windows Apps & Features functionality. The application name to uninstall is CloudStream Device Monitoring Server.
-
Go to Device Configuration, then click Device Monitoring Service.
-
Select the Device Monitoring service from the list, and then click Delete.
-
You can now optionally delete any devices that were discovered and monitored by the Device Monitoring Service. Refer to Delete Devices for instructions.
To upgrade to a new version of the Device Monitoring application, download the latest installer from the Software Downloads page in CloudStream. For an upgrade, the Onboarding code,service locator URL and database set-up details are gathered from the existing install and are not requested during the upgrade process.
-
Run the installer.
-
Select the language.
-
Enter the Service Login information, and then click Install to proceed.
-
Once complete, click Finish to close the installer.