Auth Agent Installation
RICOH CloudStream authentications happen in the cloud; however, LDAP and LDAP Secure (LDAPS) cannot authenticate to the cloud without a VPN. Auth Agent is developed to enable onsite and cloud LDAPs to perform authentication in CloudStream DM securely.
You can set up multiple auth agents in your on-premise environment and assign them all to your LDAP authentication profile.
Before you begin, please take note of the system requirements listed below.
| Server Requirement for Auth Agent | |
|---|---|
|
Server Requirement |
Minimum:
CPU: Intel Core i5-2300 series or better or Intel Xeon E3 series or better or AMD FX 4200 series or better or AMD Opteron 3200/4200/6200 series or better
Recommended: CPU: Intel Xeon E5 v2 series or better or AMD Opteron 3300/4300/6300 series or better
|
|
Operating System |
|
|
Virtual Environment |
|
Follow the order below to set up the Auth Agent.
| Order | Instructions |
|---|---|

|
Generate the Auth Agent onboarding code. Follow the steps in Generate Onboarding Codes. Please make sure to configure the auth agent server while the code is valid. |

|
Download the auth agent Installer from RICOH CloudStream Device Management by following the steps below.
|

|
Install Auth Agent. |

|
If you are using LDAP Secure, please install the LDAPS server certificate. Install the certificate in a trusted root certification authorities certificate store. |
 If you want to remove or upgrade an Auth Agent, follow the steps in Remove or Upgrade Auth Agent.
Install Auth Agent
| Prerequisites |
|---|
| The tool requires Java Corretto 17 installed on the computer. If a previous version of Java is installed, you must uninstall it before proceeding. The installer will check to determine if Amazon Coretto 17 is installed on the server. If not, a notification message is displayed and you must click Install to proceed. The Auth Agent install will proceed automatically after a successful Corretto install. |
Please make sure you have the following information:
|
| You can only install one Auth Agent per computer server. If you want to configure multiple Auth Agents, please prepare one server for each Auth Agent. |
-
Run the Auth Agent installer as administrator.
-
In the welcome screen, click [Next].
-
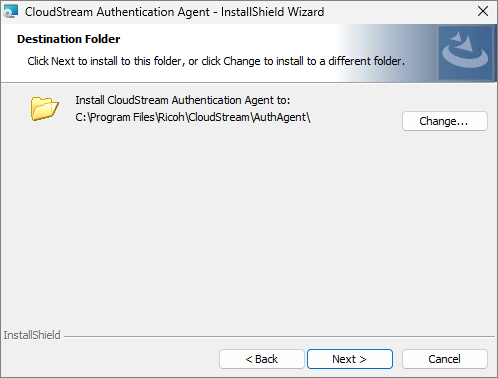
Select the destination folder. A folder is selected by default; you can change it by clicking the [Change...]. Click [Next] to proceed.
-
Enter the Auth Agent onboarding code then, click [Next].
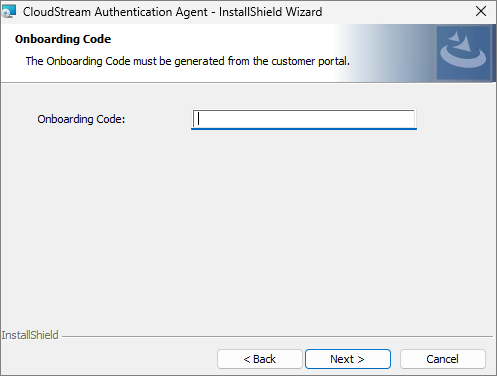 If an invalid or incorrect onboarding code is entered, a pop-up message appears to indicate the problem and prevents the installation. Verify the correct onboarding code and then try again.
 -
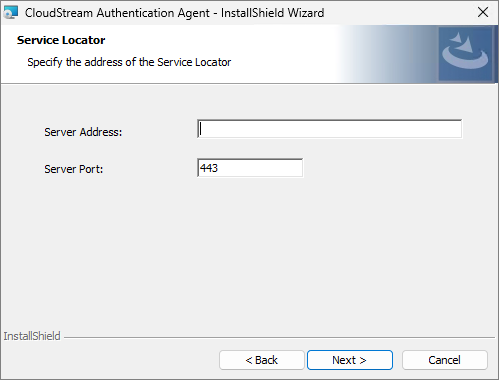
Enter the Service Locator Address into the Server Address field.
If you have the Service Locator URL, remove the "http://".
For Example, if your service locator is "http://myservicelocator.com:443", enter "myservicelocator.com" in the Server Address and "443" in the Server Port.
Click [Next].
-
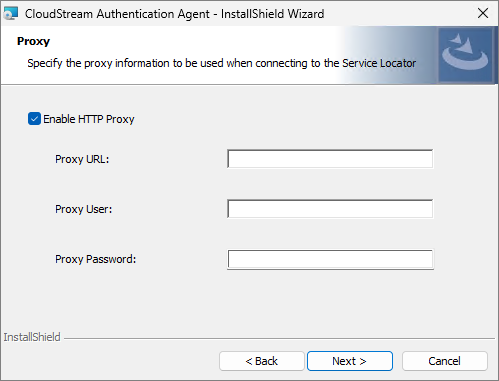
(Optional) If you configure the server to use a Proxy Server, please check the Enable HTTP Proxy, then provide the required information.
-
Click [Next]. Clicking next establishes communication with the Service Locator using the server address and port you specified.
If the communication fails, an error message will display.
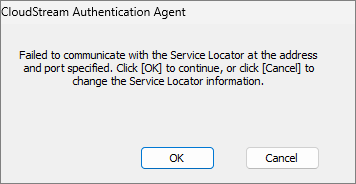
Please revisit the Server address, port, and onboarding code and make sure the values entered are valid.
-
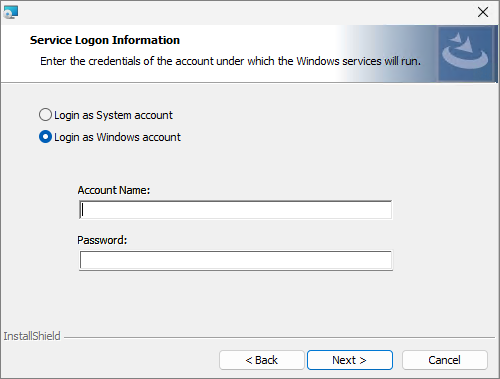
In the Service Logon Information screen, please select the type of login you want to use. In this step, you will select the account that has administrator access to the server.
-
If you want to use the system account that you are logged in to, choose Login as System account.
-
If you want to input a Windows account, choose Login as Windows account.
-
-
Click [Next].
-
Your auth agent is ready to install; please click [Install].
The installer should display a success message and its service must be running.
To check the Auth Agent service, search, and open services.msc from the Start menu.
Troubleshooting
-
If the installation fails, please make sure that the Service Logon Information you provided has administrator rights to install the application.
-
If Auth agent is installed, but the service is not running, please run the service manually in services.msc and ensure it is set to run automatically.
-
The Onboarding code is time-limited, so make sure the code is valid when installing the auth agent. If you are not certain that the code is valid, please generate a new one.
-
If the Auth agent installation fails or the authentication using Auth agent encounters errors, please ensure that the server where the auth agent is running has a stable internet connection.
Check the Auth Agent in CloudStream DM
-
Certificate Management - Once the auth agent is able to communicate with the service locator, a certificate will be granted to the auth agent. You can find this certificate in Systems, then Security, and click Client Certificates. The auth agent's Client Name is the computer's name. You can use the filter function to filter your search.
-
Auth Agent node in LDAP Authentication Profile - All certified auth agents will appear in the Auth Agent node of an LDAP authentication profile. Open an existing LDAP authentication profile or create a new one. Expand the Auth Agent node and see the auth agent listed in the Not Assigned pane. Select the auth agent and click the up arrow to assign the auth agent to the profile.
An auth agent can be assigned to multiple LDAP Authentication Profiles.