Login to Print&Scan PC Client
 Before you login to Print&Scan PC Client, your account must register to the CloudStream DM. The PC Client authenticates the user sending the print job before the job is sent to the printer. To register a user, refer to Register Users.
 You can find detailed Print&Scan PC Client documentation
-
After installing the PC Client, open the PC Client login screen to authenticate your account.
In the notification tab, right-click on the PC Client and click Login.
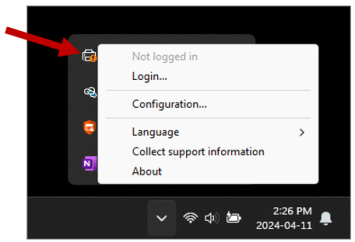
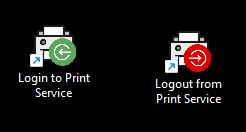
If the Login shortcut is added during installation, click the 'Login to Print Service" in your desktop to display the login screen.
-
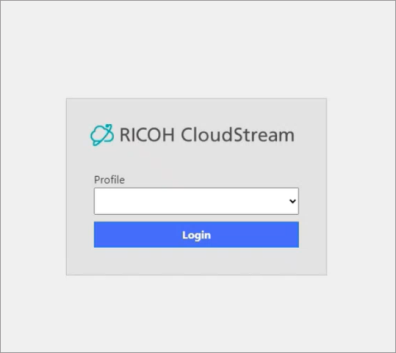
A browser will open displaying the CloudStream DM login page. Select the profile that you would like to get authenticated with.
-
Click [Login].
-
You will be redirected to your external authentication provider, provide the correct credentials to get authenticated.
If the authentication fails, please contact your IT administrator or the external authentication provider for support.
-
A successful authentication will display the CloudStream DM Consent page. This page will ask for your consent to allow the CloudStream DM service to access your account.
Please check all three permissions to continue using RICOH CloudStream Print&Scan.
-
profile
-
offline_access
-
email
-
-
Click [Submit Consent].
If you did not give your consent or click [Cancel], the RICOH CloudStream Print&Scan cannot sign you in because the service will need all three permissions mentioned in the previous step.
When consent is given, you will return to the success page and displaying:
